Key Takeaways
-
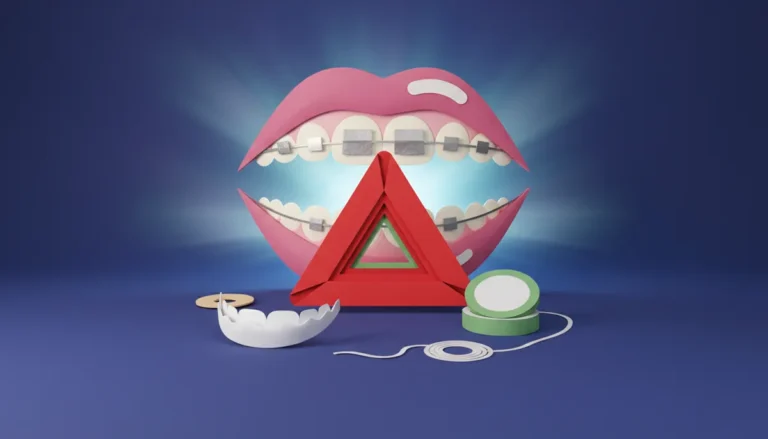
The braces start appointment typically takes 1-2 hours and is painless, involving bracket placement, wire threading, and color band selection, with tooth soreness resolving within a few days.
-
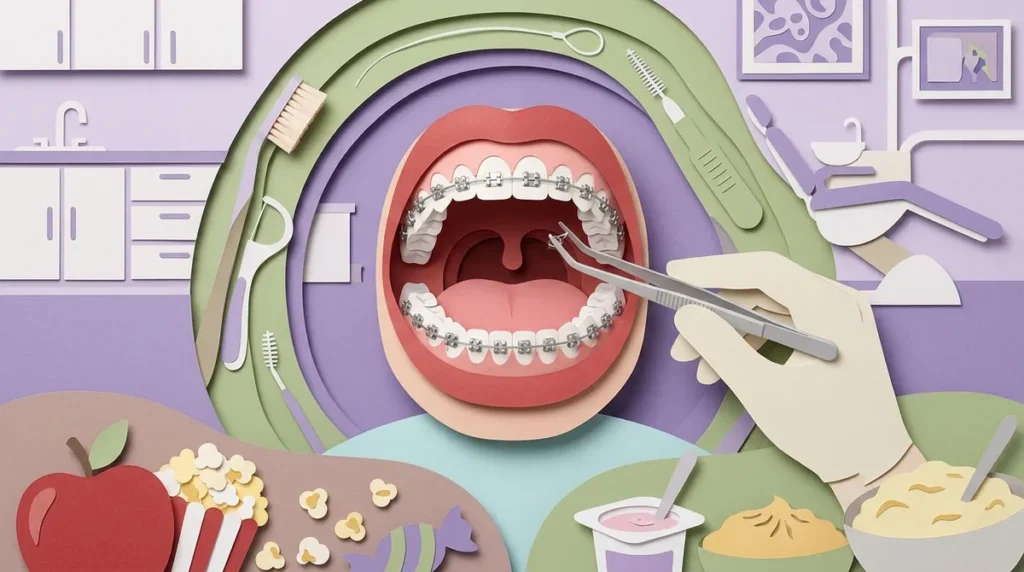
Proper oral hygiene is critical during treatment—brush after every meal with a soft-bristled toothbrush, use floss threaders or water flossers, and clean around brackets with interdental brushes to prevent white spots, cavities, and gum problems.
-
Avoid hard, sticky, and crunchy foods like whole apples, popcorn, hard candy, bagels, and ice; cut fruits and vegetables into small pieces and eat soft alternatives during the first few days when teeth are most sensitive.
-
Most bracket breakage is preventable by avoiding biting hard objects like pencils and ice, cutting hard foods into pieces, wearing a mouthguard during sports, and being careful with sticky candies that can pull brackets off.
-
You'll receive a take-home care kit including an orthodontic toothbrush, floss threaders, interdental brushes, and orthodontic wax to manage irritation and maintain dental health throughout treatment.
-
Some soreness and cheek irritation in the first 1-2 weeks is normal; over-the-counter pain relievers, soft foods, warm salt water rinses, and orthodontic wax provide effective relief during adjustment.
So, you’ve decided to get braces — exciting times ahead! Whether you’re a parent bringing your child in for the first time, a teen ready to transform your smile, or an adult finally taking that step, your braces start appointment is a big milestone. And like any big milestone, it helps to know what’s coming so you feel calm, prepared, and ready to smile through it all.
The good news? This appointment is much more straightforward than many people expect. Yes, it takes a little time — usually about one to two hours — but it’s not painful, and by the end, you’ll walk out with a brand-new set of braces and a clear roadmap for your smile journey. Let’s break down exactly what happens, step by step, so you know what to expect from start to finish.

What Is the Braces Start Appointment?
The braces start appointment — also called the bonding appointment — is the day your braces are actually placed on your teeth. It follows your initial consultation and any preparatory dental work. This is the appointment where your orthodontic treatment officially begins! If you haven’t already, take a look at our first orthodontic visit guide to understand what happens before this day.
Think of it like the launch day of your smile project. Everything is set, the plan is made, and now it’s time to get things moving — literally. Your teeth will begin shifting soon after this appointment, and that’s a very good thing!

Step-by-Step: What Happens During Placement
Step 1: Cleaning and Preparing Your Teeth
Before anything is bonded to your teeth, the orthodontist or assistant will thoroughly clean and dry your teeth. This is essential for making sure the brackets stick properly. Clean, dry teeth create the best surface for a strong bond. This step takes just a few minutes and feels similar to a routine cleaning.
Step 2: Placing the Brackets
Next comes the part everyone wonders about — placing the brackets. Each bracket is carefully bonded to the front surface of each tooth using a dental adhesive. The brackets are small, and their position is very precise. Proper placement is key to guiding your teeth into the right position over time. You can learn more about the different styles available by reading about types of braces we offer.
A special light is used to cure (harden) the adhesive quickly. This part is completely painless — you may just feel some pressure and a little dryness in your mouth from the cheek retractors used to keep your lips out of the way.
Step 3: Threading the Wire
Once all the brackets are in place, the orthodontist threads a thin archwire through each bracket. This wire is what actually does the work of moving your teeth. It applies gentle, consistent pressure to guide your teeth in the right direction. The wire is connected to a small slot in each bracket and held in place by the next exciting step — your color bands!
Step 4: Choosing and Placing Color Bands
Here’s the fun part, especially for kids and teens! You get to choose the color of your elastic bands (also called ligature ties or o-rings). These tiny rubber bands wrap around each bracket and hold the wire in place. They come in a huge range of colors — from classic silver or clear to bright pink, blue, green, purple, and everything in between.
Some patients love mixing and matching colors for holidays or school spirit. Others prefer more subtle tones that blend in. Either way, colors are changed at every adjustment appointment, so you can switch things up regularly. Check out our fun WildSmiles Braces options if you want to take customization to the next level!
Hygiene Instructions You’ll Receive
One of the most important parts of your braces start appointment is the hygiene education portion. Keeping your teeth and braces clean is crucial during treatment. Poor hygiene can lead to white spots, cavities, and gum problems — none of which you want after all this work!
Here’s what the team will walk you through:
- Brushing technique: You’ll learn how to brush around brackets and along the gumline using a soft-bristled toothbrush. Brushing after every meal is highly recommended.
- Flossing with braces: Floss threaders or orthodontic floss picks make it easier to clean between teeth. Water flossers are also a great tool.
- Rinsing with fluoride mouthwash: A fluoride rinse helps protect your enamel and keeps bacteria at bay.
- Cleaning around brackets: Interdental brushes (tiny brushes that fit between brackets) are incredibly helpful for cleaning those tricky spots.
- Frequency matters: Aim to brush at least twice a day — ideally after every meal — for the best results.
We’ll send you home with some handy tools to get started, so you won’t have to figure this out on your own. Staying on top of oral hygiene during treatment is one of the most important things you can do for a beautiful end result. You can also explore our full all about braces resource for more tips.
How to Avoid Breaking Your Brackets
Broken brackets slow down your treatment. The good news is that most bracket breakage is completely preventable! Here are the key things to keep in mind:
- Don’t bite into hard foods directly: Things like apples, carrots, and corn on the cob need to be cut into small pieces first.
- Avoid chewing on hard objects: Pencils, pens, fingernails, and ice are common culprits for popped brackets.
- Be careful with sticky candy: Gummies, caramel, and taffy can pull brackets right off your teeth.
- Don’t use your teeth as tools: Opening packages or biting tags off clothing can put unexpected pressure on brackets.
- Wear a mouthguard for sports: If you play contact sports, a custom mouthguard protects your braces and your mouth.
If a bracket does come loose, don’t panic — just give us a call or check our orthodontic emergency page for guidance on what to do next. We’re always here to help!
Foods to Avoid With Braces
Let’s talk about food — because this is a big adjustment for many patients. The good news is that most of your favorite foods are still totally fine! You just need to avoid a specific list of troublemakers.
| Foods to Avoid | Why They’re Problematic | Friendly Alternatives |
|---|---|---|
| Hard candy and lollipops | Can crack brackets or bend wires | Soft chocolate, smoothies |
| Chewy/sticky candy (taffy, gummies) | Pulls brackets off teeth | Pudding, yogurt, Jell-O |
| Popcorn | Kernels get stuck and can break brackets | Soft crackers, rice cakes |
| Crunchy raw vegetables | Too hard for brackets | Steamed or cooked veggies |
| Whole apples or carrots | Biting pressure damages brackets | Sliced apple, baby carrots (cut small) |
| Bagels and hard rolls | Chewy texture can pop brackets | Soft bread, tortillas |
| Chewing ice | Extreme pressure on brackets | Cold water, smoothies |
The first few days after your braces start appointment, your teeth may feel a little sore and tender. This is completely normal! Soft foods like mashed potatoes, soup, yogurt, pasta, and scrambled eggs are your best friends during this adjustment period. The discomfort fades within a few days as your mouth adjusts.
The Dental Care Tools You’ll Take Home
At the end of your braces start appointment, we’ll send you home with a care kit to make your hygiene routine easier. Here’s what’s typically included:
- Orthodontic toothbrush: Designed with a V-shaped bristle pattern to clean around brackets more effectively.
- Floss threaders or orthodontic floss: Makes it easier to thread floss under the wire for proper cleaning between teeth.
- Interdental brushes: Small proxy brushes that clean between and around each bracket.
- Orthodontic wax: Applied to any brackets or wires that feel sharp or irritate your cheeks or lips. It provides instant relief and is completely safe to use.
- Informational guide: A written rundown of care instructions, foods to avoid, and emergency contact information — everything in one handy place.
Using these tools consistently makes a huge difference in your results. We want your teeth to be as healthy as they are straight when your braces come off!
What to Expect in the Days After
It’s completely normal to feel some soreness and sensitivity in the first two to five days after getting braces. Your teeth are beginning to shift, and your mouth is getting used to the new hardware. Over-the-counter pain relievers like ibuprofen or acetaminophen can help ease the discomfort. Eating soft foods and rinsing with warm salt water also helps soothe sore gums.
You may also notice that your cheeks and lips feel a little raw from the brackets. This is where your orthodontic wax comes in handy! Apply a small piece to any bracket that’s causing irritation. Within a week or two, your mouth will toughen up and adjust — and you’ll barely notice the braces are there.
Braces for Every Age and Stage
Whether you’re a parent scheduling a child’s early orthodontic treatment, a parent exploring teen orthodontic treatment, or an adult finally ready to invest in your smile through adult orthodontics, the braces start appointment process is essentially the same — and equally exciting for everyone involved.
At Segovia Orthodontics in Lakewood Ranch, FL, Dr. Flor Segovia and her team make every patient feel comfortable and informed from the very first bracket placed. She’s a board-certified orthodontist who uses advanced orthodontic technology to ensure precise, effective treatment for patients of all ages. The practice is recognized by the American Board of Orthodontics for its commitment to excellence in orthodontic care.
If you’re curious about what treatment option is right for you, our braces vs. clear aligners guide can help you weigh your options. Not quite ready for braces? Our clear aligners page is a great place to explore a more discreet path to a straight smile.
Quick Comparison: Braces vs. Clear Aligners at Your Start Appointment
| Feature | Traditional Braces | Clear Aligners |
|---|---|---|
| Placement time | 1–2 hours | 30–60 minutes |
| Visibility | Visible brackets and wire | Nearly invisible |
| Food restrictions | Yes (remove certain foods) | Remove aligners before eating |
| Hygiene adjustments | Special tools needed | Remove aligners for brushing |
| Customization | Color bands and bracket styles | Clear, subtle appearance |
| Best for | Complex cases, all ages | Mild to moderate cases, adults/teens |
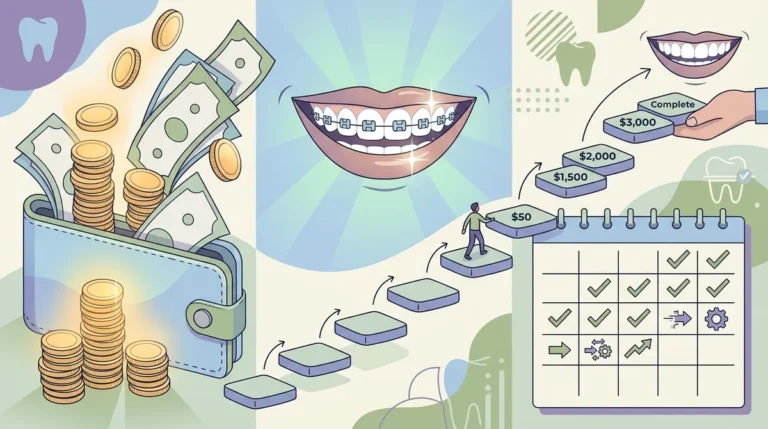
Financing Your Braces Treatment
Worried about the cost of braces? You’re not alone! The good news is that orthodontic treatment is more affordable than many people think, especially with flexible payment plans. Visit our orthodontic financing page to learn about the options available to make your treatment budget-friendly. Many families find that monthly payments fit comfortably into their regular budget.
You can also check out our FAQ on orthodontic treatment for answers to common questions about costs, timelines, and what insurance typically covers.
Stay Connected and Inspired
Starting braces is a journey, and we love celebrating every step of it with our patients! Follow along on our Instagram page for before-and-after smiles, tips, and fun content from our Lakewood Ranch team. You can also connect with our community on our Facebook page to stay updated on office news and patient spotlights.
Ready to see what all the excitement is about? Visit us on Google — Segovia Orthodontics to read reviews from real patients in the Lakewood Ranch area and see why so many families trust us with their smiles.
Your Smile Journey Starts Now
Your braces start appointment is the beginning of something truly exciting — a healthier, straighter, more confident smile. It’s totally normal to feel a little nervous, but by knowing what to expect, you can walk in with confidence. From placing brackets and threading wires to choosing fun color bands and learning how to care for your braces, every part of this appointment is designed with your comfort and success in mind.
The team at Segovia Orthodontics is passionate about making every patient feel informed, supported, and genuinely excited about their smile transformation. We’re here every step of the way — from that very first bracket to the day your braces come off and you see your beautiful new smile for the first time.
Ready to take that first step? We’d love to welcome you! Request your appointment today and let’s get your smile journey started — we can’t wait to meet you!
FAQs
Q: How long does the braces start appointment take?
A: Great question! Most braces start appointments take about one to two hours from start to finish. This gives your orthodontist enough time to carefully clean your teeth, bond each bracket, thread the wire, and go over all your care instructions so you feel totally prepared.
Q: Does getting braces put on hurt?
A: The good news is that the placement process itself is painless! You may feel some pressure and mild discomfort while the brackets are being bonded, but nothing that should cause real pain. Some soreness and tenderness in the first few days after is completely normal as your teeth begin to shift — soft foods and over-the-counter pain relievers can help a lot!
Q: Can I eat right after my braces start appointment?
A: Yes, you can eat after getting your braces on — but stick to soft foods for the first few days! Think mashed potatoes, yogurt, soup, and pasta. Your teeth will be a little sore and sensitive as they adjust, so give them a gentle start. Your full list of foods to avoid will be reviewed with you at the appointment.
Q: What color bands should I choose for my braces?
A: The fun answer is: whatever makes you smile! Color bands are completely personal, and there are no wrong choices. Many patients love matching their school colors, celebrating holidays, or just picking their favorite color. The best part? You get to change them at every adjustment visit, so you’re never stuck with one look for long.
Q: What should I bring to my braces start appointment?
A: Just bring yourself, your insurance information if applicable, and a list of any questions you have! We’ll provide everything you need during the appointment, including your take-home care kit with brushes, floss threaders, and orthodontic wax. We want your first day to be as smooth and exciting as possible!