Key Takeaways
-
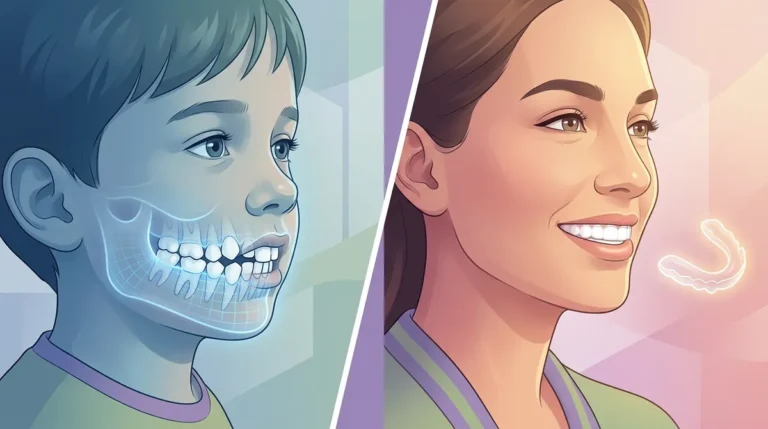
Attachments are tiny tooth-colored dots bonded to specific teeth that allow aligners to grip and move teeth precisely; the painless placement process takes only seconds per tooth using composite material and a curing light.
-
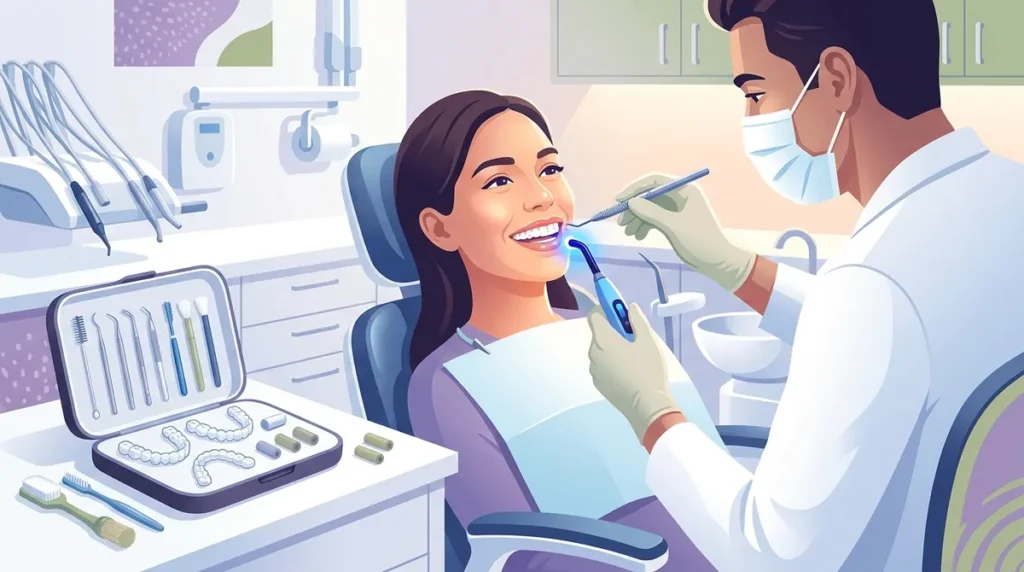
Clear aligner start appointments last 60-90 minutes and include attachment placement, detailed instructions on insertion/removal and 20-22 hour daily wear, hygiene protocols, and receiving a starter kit with cleaning tools and chewies.
-
Maintain strict oral hygiene by brushing before reinserting trays, rinsing aligners with cool water, using soft brushes with mild soap, and avoiding colored drinks while wearing trays to prevent cavities and keep aligners clear.
-
Store aligners in their protective case when not in use, rinse with cool water before inserting, and use soft-bristled brushes only; never use hot water, toothpaste, or abrasive cleaners as these can damage the plastic.
-
Mild pressure, tightness, slight speech changes, and increased saliva production during the first few days are completely normal signs that your aligners are working and your mouth is adjusting.
-
Prepare for your appointment by eating a meal beforehand, brushing and flossing your teeth, bringing questions, having over-the-counter pain relief on hand, and taking before photos to document your smile transformation.
You finally said yes to clear aligners — congratulations! That first appointment is just around the corner, and you might be wondering what to expect. Will it hurt? How long will it take? What exactly happens in that chair? We totally get it — the unknown can feel a little nerve-wracking. But here’s the good news: your clear aligner start appointment is actually pretty exciting. It’s the day your smile journey officially begins, and it’s much more manageable than you might think. Whether you’re a busy professional, a mom getting treatment alongside your teen, or someone who’s been dreaming of straighter teeth before a big life event, this guide walks you through every step of your first clear aligner appointment so you feel confident and prepared walking through those doors.

Why Your Clear Aligner Start Appointment Matters So Much
Your clear aligner start appointment is more than just picking up a set of trays. It’s the foundation of your entire treatment. Everything that happens at this visit sets the stage for how well your aligners will work. A well-run start appointment means your teeth move correctly, comfortably, and on schedule. That’s why the team at practices like Segovia Orthodontics takes this visit seriously and makes sure every patient leaves feeling informed and excited.
If you want to know more about what the very first visit to an orthodontic office looks like in general, check out this helpful guide on your first orthodontic visit. Your clear aligner start appointment builds on that experience with a clear, step-by-step process.

Step-by-Step: What Happens at Your Clear Aligner Start Appointment
Here’s a simple breakdown of everything that takes place during this important visit. Most appointments last between 60 and 90 minutes, so plan accordingly!
Step 1: Placement of Attachments
This is often the most surprising part for new patients. Attachments are tiny tooth-colored dots bonded onto specific teeth. They’re made from the same material as tooth-colored fillings, so they blend right in. These small shapes give your aligners something to “grip” so they can move your teeth in very precise directions.
- Your orthodontist identifies which teeth need attachments based on your custom treatment plan.
- The surface of each tooth is gently prepared with a mild conditioner to help the attachment bond securely.
- A small amount of composite material is placed on the tooth in a specific shape — round, square, or rectangular depending on the movement needed.
- A curing light hardens the attachment in just a few seconds.
- Your aligner tray is seated over the attachments to check the fit.
Don’t worry — this process is painless and goes faster than you’d expect. Most people are surprised by how easy it is! To learn more about how clear aligners work with attachments, our treatment page explains it beautifully.
Step 2: A Review of How Your Aligners Work
Once your attachments are in place, your orthodontist or treatment coordinator will walk you through exactly how your aligner system works. This isn’t just a quick overview — it’s a detailed review so you feel confident using your trays at home.
Here’s what will typically be covered:
- How to insert and remove your aligner trays properly
- How long to wear each tray (usually 20–22 hours per day)
- When to move to your next set of trays
- What mild pressure or soreness is normal and when to call the office
- How to track your progress between appointments
Understanding how your treatment works makes a huge difference in your results. Patients who understand their aligner system are far more likely to wear their trays consistently — and consistent wear is the secret to a beautiful outcome. You might also enjoy reading about 7 clear aligner mistakes that can ruin your smile results so you know what to avoid from day one.
Step 3: Hygiene Instructions for Clear Aligner Wearers
Here’s something really important: wearing clear aligners changes your oral hygiene routine a little. Your team will walk you through everything you need to know to keep your teeth and trays clean throughout treatment.
Good hygiene during aligner treatment matters for three big reasons:
- Preventing cavities: Food and bacteria can get trapped between your teeth and your trays if you’re not careful.
- Keeping aligners clear: Dirty aligners become cloudy and visible, which defeats the purpose of using clear trays.
- Protecting your gum health: Clean trays mean less bacterial buildup around your gum line.
Your hygiene instructions will include:
- Brushing your teeth before reinserting trays after every meal
- Rinsing your aligners with cool water each time you remove them
- Cleaning trays with a soft toothbrush and mild soap (not toothpaste, which can scratch)
- Soaking aligners regularly to keep them fresh and clear
- Avoiding colored drinks like coffee, tea, and wine while wearing your trays
The American Board of Orthodontics emphasizes that oral health maintenance during orthodontic treatment is just as important as the treatment itself. So don’t skip the hygiene chat — it’s a big deal!
Step 4: How to Take Care of Your Aligners
Beyond hygiene, your team will also explain how to handle and store your aligners properly. Clear aligner trays are durable, but they do need a little TLC to stay in top shape throughout your treatment.
| Aligner Care Do’s | Aligner Care Don’ts |
|---|---|
| Store in the provided case when not in use | Leave them wrapped in a napkin (easy to throw away!) |
| Rinse with cool water before inserting | Use hot water (it can warp the plastic) |
| Keep your previous set of trays as backup | Throw away old trays immediately |
| Use a soft-bristled brush to clean trays | Use toothpaste or abrasive cleaners on trays |
| Remove before eating or drinking anything except water | Eat or chew with your aligners in |
These tips protect your investment and keep your treatment moving forward on schedule. If you ever have questions between visits, don’t hesitate to reach out to our team — we’re always happy to help.
Step 5: You’ll Receive Dental Cleaning Tools
One of the best parts of your clear aligner start appointment? You won’t leave empty-handed! Your orthodontic team will send you home with a starter kit of dental cleaning tools designed specifically for aligner patients.
Here’s what you can typically expect to receive:
- A travel toothbrush — perfect for brushing on the go after meals
- Orthodontic floss or a floss threader for cleaning between teeth
- A carrying case for your aligners
- Aligner removal tools (a small hook-shaped device that makes popping trays out much easier)
- Chewies — soft foam cylinders you bite on to seat your aligners snugly against your teeth
These tools make your at-home care routine so much easier. Think of them as your clear aligner starter pack for success. Ready to start your journey? You can schedule your aligner start appointment right from our website.
What to Expect in the Days After Your Appointment
The first few days of wearing your aligners can feel a little strange. Here’s what’s completely normal:
- Mild pressure or tightness when you switch to a new tray — this means it’s working!
- Slight speech changes like a lisp for the first day or two — this goes away quickly
- Increased saliva production as your mouth adjusts to the trays
- Some sensitivity around teeth with attachments
If something feels truly uncomfortable or a tray doesn’t fit right, don’t wait. Learn more about what counts as an orthodontic emergency and when to call your doctor.
Comparing Clear Aligners to Braces at Your Start Appointment
Wondering how a clear aligner start appointment compares to getting braces? Here’s a quick look:
| Feature | Clear Aligner Start Appointment | Braces Placement Appointment |
|---|---|---|
| Duration | 60–90 minutes | 90–120 minutes |
| Pain level | Minimal to none during appointment | Minimal during placement |
| Attachments/Brackets | Small tooth-colored attachments | Metal or ceramic brackets bonded to teeth |
| Removable? | Yes — for eating and cleaning | No — fixed for full treatment duration |
| Hygiene complexity | Moderate — brush and rinse trays | Higher — clean around wires and brackets |
If you’re still deciding between options, our detailed guide on braces vs. clear aligners can help you choose the path that fits your lifestyle best.
Tips to Make Your Clear Aligner Start Appointment Go Smoothly
A little preparation goes a long way! Here are some simple ways to set yourself up for a great first appointment:
- Eat a good meal beforehand. You’ll be in the chair for a while, and you won’t want to chew with your new attachments right away.
- Brush and floss before you arrive. Clean teeth make the attachment bonding process faster and easier.
- Bring your questions. Your start appointment is the perfect time to ask anything on your mind — no question is too small!
- Plan for mild sensitivity afterward. Have some over-the-counter pain reliever on hand just in case.
- Take photos! Document your before smile — you’ll love comparing it to your after.
Want to know what questions to ask when you’re in the chair? Our guide on how to ask the right orthodontic questions at your visit is a great resource to read beforehand.
Why Choose Segovia Orthodontics for Your Clear Aligner Journey
At Segovia Orthodontics at Lakewood Ranch, every clear aligner start appointment is handled with warmth, care, and expertise. Dr. Flor Segovia is a board-certified orthodontist who uses advanced orthodontic technology to create personalized treatment plans that work. Whether you’re an adult looking for discreet treatment, a teen ready for their first aligner experience, or a parent getting treated alongside your child, the team makes every step of the process feel comfortable and exciting.
You can follow along with patient stories, tips, and updates on our Facebook page or get a behind-the-scenes look at the practice on our Instagram page. And if you’d like to see what patients are saying, visit us on Google — Segovia Orthodontics to read real reviews from real smiles in the Lakewood Ranch community.
Financing your treatment is easier than you might think, too. Check out our orthodontic financing options to find a plan that fits your budget — because a beautiful smile should be accessible to everyone.
Your Clear Aligner Journey Starts with One Appointment
Your clear aligner start appointment is truly just the beginning of something wonderful. You’ll leave with your first set of trays, a kit full of helpful tools, a solid understanding of how everything works, and a whole lot of excitement about the smile you’re building. The process is straightforward, the team is there every step of the way, and the results are absolutely worth it.
Whether you have a wedding coming up, a big career move ahead, or simply want to feel your best every single day, there’s no better time to start than right now. Request your clear aligner start appointment today and take the first step toward the smile you deserve. You’ve got this — and we’ve got you!
FAQs
Q: How long does a clear aligner start appointment usually take?
A: Most clear aligner start appointments take between 60 and 90 minutes. This gives the team plenty of time to place your attachments, fit your first trays, review how everything works, and make sure you leave feeling totally prepared and excited for your journey!
Q: Does the clear aligner start appointment hurt?
A: The good news is that the appointment itself is generally painless! Placing attachments is quick and comfortable. You might feel some mild pressure or tightness once your first trays are in — that’s completely normal and a sign that your aligners are already doing their job.
Q: What should I bring to my clear aligner start appointment?
A: We recommend eating a meal beforehand, brushing and flossing your teeth before arriving, and bringing a list of any questions you have. It’s also a great idea to bring a small bag — you’ll be taking home your cleaning tools and aligner case!
Q: Will I get my aligners at the start appointment?
A: Yes! Your first set of aligner trays will be seated and checked during your start appointment. You’ll leave wearing your very first tray and with everything you need to care for them at home — it’s a great feeling!
Q: How do attachments affect the look of my clear aligners?
A: Attachments are tooth-colored, so they blend naturally with your teeth and are barely noticeable. Once your aligner tray is seated over them, they become even less visible. Most people won’t notice them at all during everyday conversations!